| Welcome, Guest |
You have to register before you can post on our site.
|
| Forum Statistics |
» Members: 668
» Latest member: Zodastro
» Forum threads: 490
» Forum posts: 5,464
Full Statistics
|
| Latest Threads |
BESS with woodworking too...
Forum: Woodworking Tools
Last Post: Anderson
08-21-2026, 02:26 AM
» Replies: 27
» Views: 89,470
|
Wire Edge Prevention
Forum: Burr Removal Methods, Testing and Results
Last Post: WI_Hedgehog
07-30-2026, 06:24 AM
» Replies: 64
» Views: 258,734
|
Protocol for BESS measure...
Forum: Edge Sharpness Testing
Last Post: WI_Hedgehog
07-24-2026, 10:00 AM
» Replies: 11
» Views: 11,782
|
How to prevent the edge o...
Forum: All About Edges
Last Post: WI_Hedgehog
04-30-2026, 01:12 PM
» Replies: 6
» Views: 19,030
|
Blade Taper Angle? - Supe...
Forum: All About Edges
Last Post: WI_Hedgehog
04-30-2026, 01:01 PM
» Replies: 9
» Views: 30,206
|
Knife dulls overnight aft...
Forum: All About Edges
Last Post: WI_Hedgehog
04-30-2026, 09:01 AM
» Replies: 27
» Views: 96,563
|
The DILAGON: a DIY laser ...
Forum: All About Edges
Last Post: WI_Hedgehog
04-30-2026, 07:57 AM
» Replies: 27
» Views: 121,393
|
Used Rapid Edge Extend-A-...
Forum: Relevant General Discussion
Last Post: WI_Hedgehog
04-30-2026, 06:49 AM
» Replies: 3
» Views: 9,183
|
Saved old tool (Fun with ...
Forum: Relevant General Discussion
Last Post: WI_Hedgehog
04-30-2026, 06:43 AM
» Replies: 1
» Views: 3,912
|
Mike Brubacher has passed
Forum: Relevant General Discussion
Last Post: WI_Hedgehog
04-30-2026, 06:15 AM
» Replies: 2
» Views: 3,491
|
|
|
| Why are burrs so malleable? |
|
Posted by: grepper - 06-03-2017, 10:39 PM - Forum: Burr Removal Methods, Testing and Results
- Replies (48)
|
 |
I’ve been doing a bunch of experiments with burr removal and I’m puzzled.
Does anyone know why some burrs are so !@#$!$’ing malleable?
I’ve had burrs that I can bend over and over and over and over… again at 45 degrees and they are extremely resistant to fracturing. They almost refuse to fracture and break off. Additionally, even thought I didn’t do it, I’m sure that if I did the same thing with the blade itself it would break after only a few bends.
The thing that is really a head scratcher is that burrs are really very thin, but they seem to have the malleability of gold and are far more malleable than the blade itself.
I was reading on the Science of Sharp website where the author was talking about stropping 300 – 500 strops on the extremely thin metal on the edge of a razor blade. 300 – 500 strops on edges only a couple of microns thick! Why is that?
I’ve had a lot of experience with stress fracturing metal. It always seems to happen when I don’t want it to. Bolts break in half, some piece of metal I’ve bent cracks or fails under normal use with what would seem to be not that much stress. Yet with a burr, when I want it to fracture and break, that extremely thin little sliver of steel is amazingly fracture resistant.
I’m guessing that something happens to the metallurgy of the steel when the burr is formed. Perhaps Mr. Jan or Mr. Mark can chime in and help explain this odd metal behavior.
|

|
|
| Deburring #2 |
|
Posted by: grepper - 06-01-2017, 09:40 PM - Forum: Edge Sharpness Testing
- No Replies
|
|
In my endless search for the perfect, fast and efficient burr removal method/stuff I've tried:
wood from very hard to balsa
various types of plastic, smooth, rough, hard, soft, etc.
various types of rubber and rubber like stuff, smooth, rough, hard, soft, etc.
paper wheels
brass wire wheels, stiff and very fine
soft buffing wheels
smooth leather, rough leather, both with/without compound
Scotch Brite belts, xtra fine
felt belts with/without compound
scraping the edge with a sharp metal edge (try to cut off the burr)
denim pads
nylon and stiff plastic brushes by hand
brass brushes by hand
no doubt I've forgotten something
In all cases I did more or less the same process. Mark a burr, try to remove it and do sharpness testing along the way. Keep checking progress along the way with a microscope. It's a very time consuming process.
Additionally, I did each of those with varying pressure, from just kissing the edge to jamming the blade into the stuff I was testing. It has gone on and on.
It's not difficult to remove a burr. But to remove the burr and not dull the edge, or destroy a nice toothy edge is a different animal altogether. Some things remove burr but dull or destroy the sharp edge. Other things can't remove a burr without just bending the burr 1,000 times. Some thinge polish the edge which I want to avoid. Other stuff just plain fails.
So far, the rough side of a leather belt with a bit of Tormek compound on the Kally works just as well if not better than other stuff. The major problem there is that the compound can smooth a beautiful, toothy edge.
I have not tried super fine compounds or really putting on a thick application of various compounds.
Still looking, still searching, still hoping I'll stumble on just the right magic burr removal stuff/method. I'll find it. I just need to be patient. 
|
|
|
|
| Knife to Belt Pressure vs Bevel Scratching |
|
Posted by: grepper - 05-31-2017, 09:57 PM - Forum: Edge Sharpness Testing
- Replies (24)
|
|
I was wondering why I was not seeing more of a correlation between an increasing aggressive and toothy edge when I sharpen with a significantly coarser belt abrasive. My guess was that is was due to the fact that I apply very light knife to belt pressure when I sharpen. I really don’t push against the belt hard at all, and generally see little or no belt deflection using medium weight belt.
Of course a toothy edge is directly related to the depth of bevel scratching caused by the abrasive. It only stands to reason more pressure would cause the abrasive to more deeply penetrate the steel, and that light pressure would have less penetration. This obviously results in more metal removal with more pressure than with less.
I sharpened the blade using a 120 grit almost new SiC belt applying light pressure like I usually do and produced a dandy burr:

Then I removed the burr:

Even though I was not concerned about how sharp the blade was the PT50B was just sitting there so why not? Approximately in 1/3 increments along the blade from handle to tip the sharpness readings were:
210
225
205
That seemed a bit dull from what I’m use to seeing so I gave it about 10 strops on my jeans across my thigh just to remove any crud that might still be on the edge. Then I measured sharpness again:
170
170
190
Well, huh. I wonder what that means?
Then I sharpened again, this time applying considerably more pressure on the belt and then performed an apparently sloppy job of burr removal. I could not see or feel a burr so I figured I was good to go, but as you, dear reader  , will soon see, that was a most spurious assumption. The two images are the same, just different lighting:

Now here’s the freaky part. It demonstrates not only the importance of complete burr removal but additionally just how deceptive a burr can be. Furthermore, it illuminates how the combination of both a sharpness tester and a microscope complement and verify the empirical data provided by the other. Even with all that obvious burr crud piled up on the edge of the blade, the sharpness readings were:
160
180
160
A bit of a head scratcher, eh?
Here’s the direct comparison. You can observe how increasing pressure produces more frequent and deeper scratches:

As always with my tests, take from it what you will. This was just one test and is neither extensive or conclusive. Hope you found it interesting.
|
|
|
|
| Sharpen to 120 grit? |
|
Posted by: grepper - 05-29-2017, 10:11 PM - Forum: Edge Sharpness Testing
- Replies (14)
|
|
In another thread Mr. Rupert suggested that I try 120 grit. Oddly, in all these years of sharpening, I had never considered finishing at such a coarse grit. But just the thought of it got me so giddy I had to take pause and enjoy a bourbon & branch just to calm down a bit.
Another knife I got in that bunch of knives from Salvation Army is this Cuisinart 5” Santoku. I decided it would be a fine candidate to sharpen @ 120 grit.

What a nice little knife. While a bit light in weight, it boasts a beautifully rounded and ergonomically shaped handle that is a joy to hold. Not only that, it “features a superior high carbon stainless steel blade for precision and accuracy and a sturdy bolster for balance and control”. What more could you ask? But wait! There’s more! You can pick up a new down to the Bed Bath & Beyond for $9.99. What a deal!
https://www.bedbathandbeyond.com/store/p...1016093564
It was very dull. I forgot to measure the sharpness, but I would estimate it was somewhere around 800g. You know, like a butter knife. Yet another case of the let’s just buy a new knife when the old one gets dull syndrome.
The only belt I used to sharpen it was a brand new 120 grit SiC belt, and I sharpened @ ~16°. I love those SiC belts when they are new. If only they didn’t smooth out so quickly. Then I deburred on the Kally with a leather belt and a touch of Tormek compound. When finished, I took 3 sharpness readings at roughly 1/3rd segments along the blade from handle to tip. The readings were:
110g
110g
125g
Whether push cutting or slicing, that gnarly edged little knife just effortlessly melted through everything I could find around the house to cut. It will be a joy to use. 120 grit? I’m sold! It will be interesting to see how the edge holds up. Thanks for the suggestion Mr. Rupert!
Here is the edge. Both are the exact same image, just taken with different lighting conditions to accentuate shadows or not.

|
|
|
|
| Life and Times of a Kitchen Axe |
|
Posted by: grepper - 05-29-2017, 12:13 PM - Forum: All About Edges
- Replies (14)
|
|
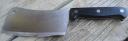
I have this cleaver, AKA kitchen axe that was one of a bunch of knives I purchased last week for $6.83 at the Salvation Army.
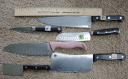
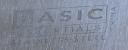
Labeled only “Basic Essentials”, "Stainless Steel" and “China”, I’m sure it’s blade is some nothing special steel.
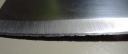
The poor thing had been abused and abandoned to the Salvation Army by its previous owners. Yet another case of folks who’s solution for a dull blade is just to throw it away and buy a new one.
Other than seafood I eat no meat, and in my 60+ years of existence I’ve never used a cleaver and still have no use for one. However, I’ve seen them used in cooking shows on TV for dismembering and disassembling animal carcasses by placing the hapless carcass on a cutting board and whacking and hacking away. I saw another dude on a Mexican cooking show placing piles of pork flesh on a cutting board, and with a cleaver in each hand, rapidly chopping the meat into small pieces for manufacturing pork tacos. He was most efficient at the process, chopping large piles of flesh into tasty bite size pieces in only seconds.
The point is that obviously this blade is going to have to endure impacts, is used for push cutting and won’t benefit from a toothy edge. While there is some evidence that even with impact use a toothy edge may endure better than a smooth edge, I’ve always been under the impression that a cleaver should have a polished edge so that’s what I did.
Its factory grind was at 20°, but this seemed too acute so I made it 25°. Probably should have done 30°, but oh well. I ground off the canyons and bashed in areas of the blade at 150 grit, then 240, 320, 400, 600, 800, 1000, 9 micron micro-finishing film belt, leather belt with Tormek 1-3 micron compound, and concluded with Mother’s Mag and Aluminum Polish on a soft felt belt. Of course, the result was a mirror finish bevel and a smooth, toothless edge.
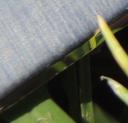
Microscopy of the thing is a really boring, uninteresting and yawn inducing smooth surface.

Upon completion the blade measured 235g sharpness at 3 locations, and one at 240g. Considering how it is to be used, I wouldn’t want it any sharper as the edge would be too thin to withstand impacts. Even 240g may be excessively sharp.
While pretty to look at, for general use it performs miserably. With the relatively fat bevel, smooth edge and only 240g sharp, it can barely cut through an orange. The blade edge just rides on the skin and requires a lot of force to break through. It can push cut 20# office paper, but fails on thin paper against the grain. It does OK on the thin skin of a pear.
For all intents and purposes it’s pretty much useless as a knife. But for whacking, hacking and bashing against a cutting board I suspect it would perform admirably. Too bad I have absolutely no use for the thing. But it was a fun little exercise, especially considering that I have a very low fun threshold. 
|
|
|
|
| "thirty years experience" |
|
Posted by: Ken S - 05-28-2017, 04:58 PM - Forum: Relevant General Discussion
- Replies (9)
|
 |
I have read the term "thirty years experience" on this forum. With all due respect, and I do hold thirty years experience in high regard, thirty years experience falls short of the mark. As a group, we have a number of the thirty year crowd, and each individual brings different experiences into the mix.
I believe our life experience, including those lives who have touched ours, can add at least as much to this forum as our direct sharpening experience.
Our combined experiences can function together to produce ideas which surpass the original idea.
Let's keep growing.
Ken
|
|
|
|
| reversing switch |
|
Posted by: Ken S - 05-27-2017, 06:27 PM - Forum: Relevant General Discussion
- Replies (2)
|
|
I am reading posts expressing different opinions about preferring grinding into or away from the edge. I leave that to the readers to form their own opinions.
The other comment I have read is preferring one direction due to the placement of the tool.For example, a knife might need to be placed downward with the wheel moving in the usual direction. This might seem inconvenient.
Having a reversing switch eliminates the placement problem. I first became aware of this watching Steve Bottorff's Sharpen School DVD. Steve reversed the direction of his buffer with Paper Wheels to allow the knife to be held level.
I like having the choice of directions.
Ken
|
|
|
|
|